WordPress.com Adds AI Crawler Controls and Consolidated SEO Tools
- Peter Schimke
- 545 views
WordPress.com's new Jetpack SEO tools add per-crawler AI access settings, author identity markup and a single SEO dashboard. Here's what to check.
Fewer people are clicking through lists of links. More of them ask an AI tool a question and get an answer assembled from pages on sites like yours. That shift raises three questions for anyone publishing online: whether people can still find your site, whether AI systems know who wrote what they're using, and whether you have any say in the matter at all.
WordPress.com's new SEO tools are an attempt to answer all three from one place. My read is that the most useful part isn't the individual features. It's that AI crawler preferences now sit alongside the search settings you already manage, so you can make both decisions in one sitting.
Where the new controls live
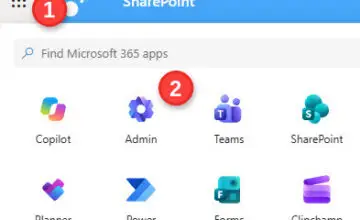
The tools are rolling out to WordPress.com sites on Premium, Business, and Commerce plans. You'll find them under Jetpack › SEO, which replaces the older path of Jetpack › Settings › Traffic. If you're already on one of those plans, open your site's dashboard, go to Jetpack → SEO, and look at the new tools.
Everything is covered in the SEO tools documentation, which is the right place to check current behaviour before you change anything on a live site.
Setting terms for AI crawlers
Not every AI crawler does the same job. Some fetch pages so an AI tool can answer a question and point to where the answer came from. Others collect content to train models. Plenty of publishers are comfortable with the first kind and uneasy about the second, and the new settings are built around that distinction.
Under Jetpack → SEO → GEO (generative engine optimization), you can set access preferences for individual supported crawlers. That's more granular than a single on/off switch, and it means you can allow citation-style access while holding back training access, provided the crawler is one of the supported ones.
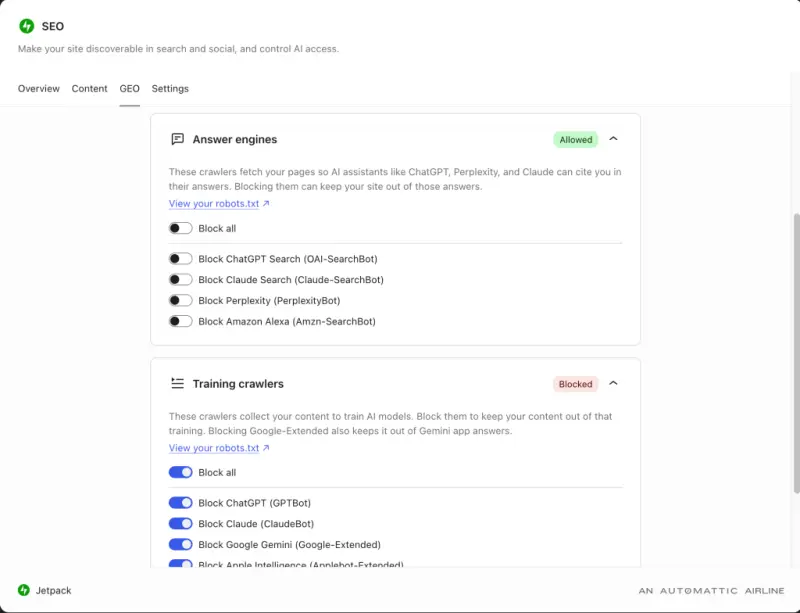
Your choices are written into your site's robots.txt file, the long-established open protocol that tells crawlers what they may request. The part that matters for planning is the last sentence of that mechanism: robots.txt is a request, not a lock. Each AI platform has to choose to honour it. A well-maintained robots.txt signals your intent clearly, but it won't physically stop a crawler that ignores it.
There's also an optional llms.txt file you can generate. It's a short summary of your site that some AI assistants use to understand what you publish. It isn't a control in the same sense as robots.txt; think of it as a briefing document you hand to the tools that read it.
Blocking training crawlers on any plan
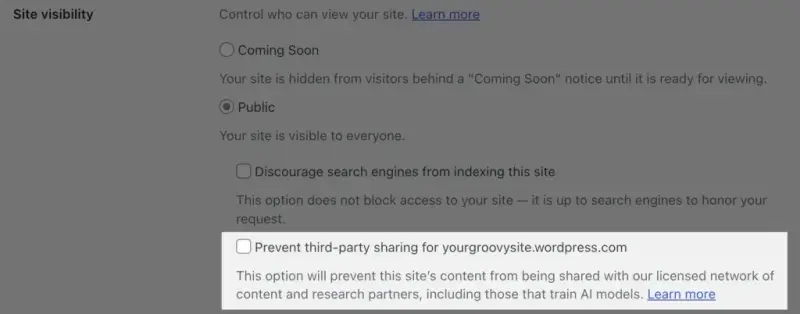
If you only want one thing from this update, it's probably this. Every WordPress.com site, on any plan, including Free and Personal, can ask known AI crawlers not to access it. Go to Settings → Reading → Site Visibility and select "Prevent third-party sharing."
The precedence rule is the detail people will trip over. When this option is on, it overrides your GEO tab choices for the crawlers it covers. So if you've carefully allowed a particular assistant in GEO but also turned on Prevent third-party sharing, that assistant is covered by the broader setting. Check both screens after you make changes, rather than assuming the most recent setting you touched is the one in effect.
Making your authorship visible
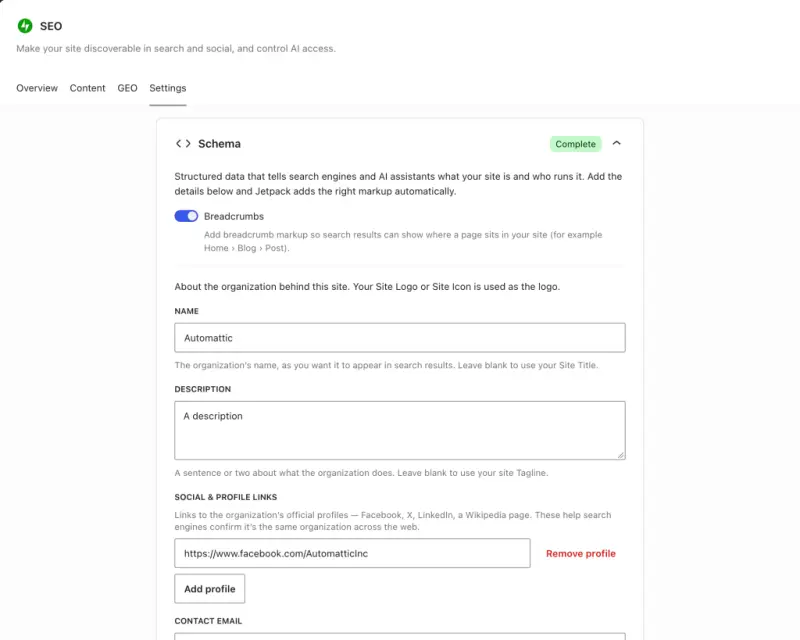
Attribution is the other half of the problem. A page can be read, summarised and quoted without the reader ever learning who wrote it. Structured data (schema) is the usual fix: a machine-readable description of who runs a site and what each page covers. Until recently, adding it meant writing markup by hand or installing a plugin to do it.
Now you enter a few details about who runs the site, and WordPress.com adds structured data across it. Bloggers and writers on multi-author sites can also set up an author profile, which keeps their name attached to each post. For a publication with several contributors, that's the feature most likely to matter in practice, because a site-level identity alone doesn't tell a crawler who wrote a given article.
One dashboard instead of several screens
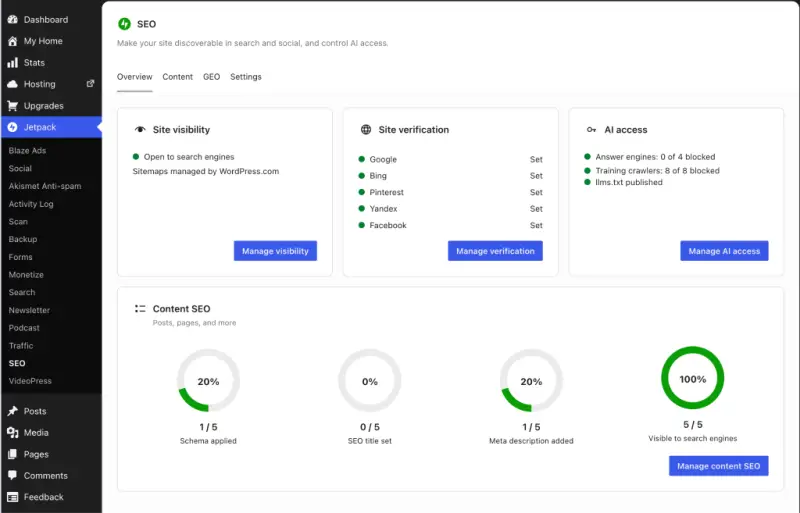
Search settings used to be scattered. Now they're gathered under Jetpack › SEO, and the SEO settings guide walks through them. Start with the Overview, which shows whether search engines can reach the site, whether it's verified, and which posts and pages have missing or weak titles and descriptions. Then move to the Content tab to fix them, with a preview of how each entry appears in search results. That saves you opening every post individually, which is where most teams lose an afternoon.
The same area holds title formats, your homepage description, canonical URLs, social sharing previews and your sitemap. Because it's built into WordPress.com, there's no separate SEO plugin to install or keep updated. If you already run a third-party SEO plugin on a paid plan, you can keep it, but check for overlapping meta tags and sitemaps before you switch anything on.
What Free and Personal sites get
On Free or Personal plans, the new page still gives you control over whether search engines index your site, and lets you verify it with services such as Google Search Console. The full set of tools, including the GEO crawler settings and the content-level fixes, requires Premium, Business, or Commerce. You can upgrade to Premium if you need them. Without an upgrade, the Site Visibility option described above remains your main lever against training crawlers.
A practical sequence for this week
If you manage one site, the order I'd follow is straightforward. First, confirm search engines can see the site and that it's verified. Second, decide which AI crawlers you're happy to have citing your work, and set those in the GEO tab. Third, turn on Prevent third-party sharing if you want training crawlers kept out, then recheck GEO for any conflicts. Fourth, add your site identity and author profiles so your name travels with your posts. Last, work through the Content tab and fix the titles and descriptions that are missing or truncated.
For a multi-site agency or an MSP managing client sites, the same steps apply, but document your choices per site. A client who wants training crawlers blocked and an editorial client who wants citation traffic will need different settings, and a shared template is how mismatches creep in. The open web works best when the people who write for it can be found and credited, and these controls are a practical way to push in that direction. Whether AI platforms honour every preference is the question to keep watching as the crawler list grows.